“Don’t shoot bull elk anywhere you can’t get a horse to,” my outfitter cautioned us on Opening Morning before we rode out of camp. The trail brought us to the top of the ridgeline by the first hints of grey light and, against the brightening sky, the silhouetted stands of tall aspens outlined interspersing open grass meadows. The pungent smell of sage in the sharp, cool air hinted too that this country was made for horses – it seemed like you could get one almost everywhere!
On the other hand, the same is not true here in New Zealand. Not only does much public land prohibit the use of ‘horsepower’, but much of the terrain does as well. We have to be a bit more creative with our techniques to maximise the meat and the efficiency of packing it out. This article will cover some of the methods for different circumstances useful for packing out game meat.
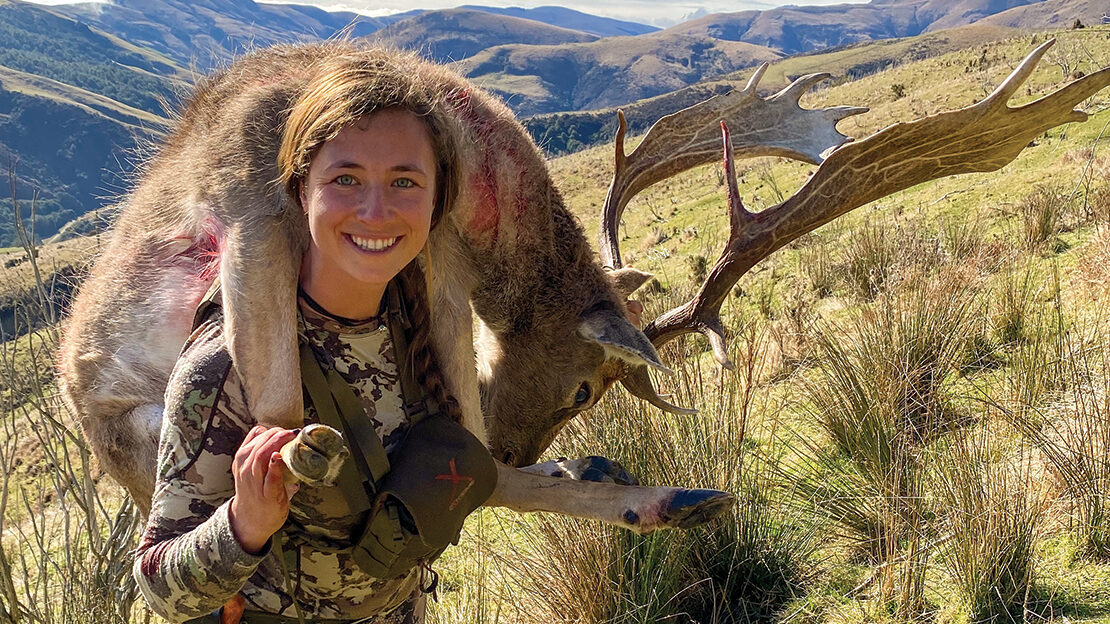
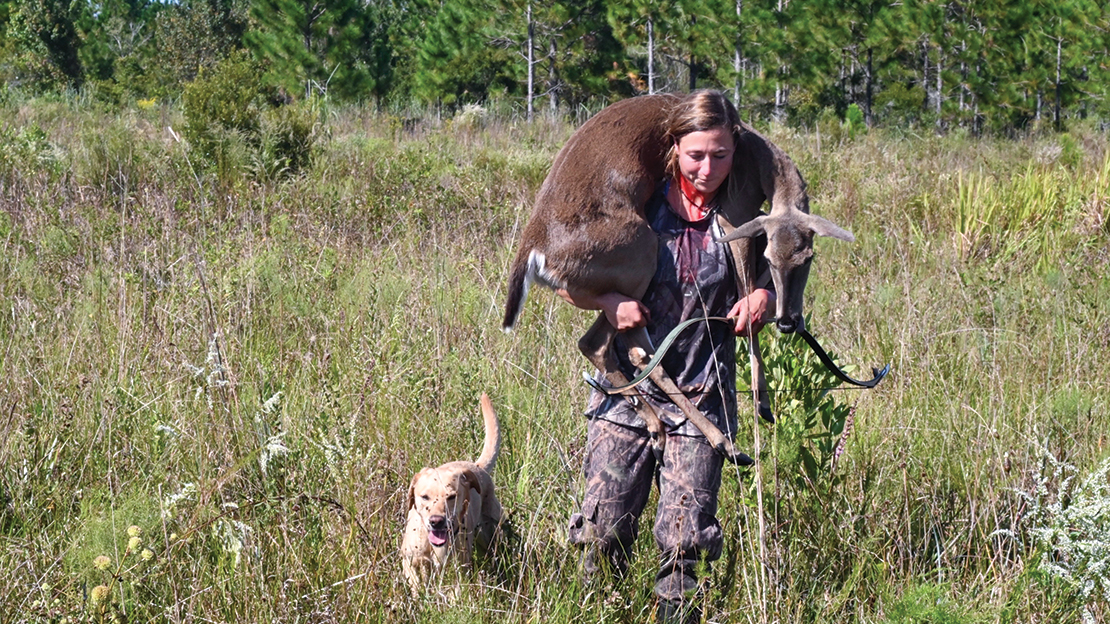
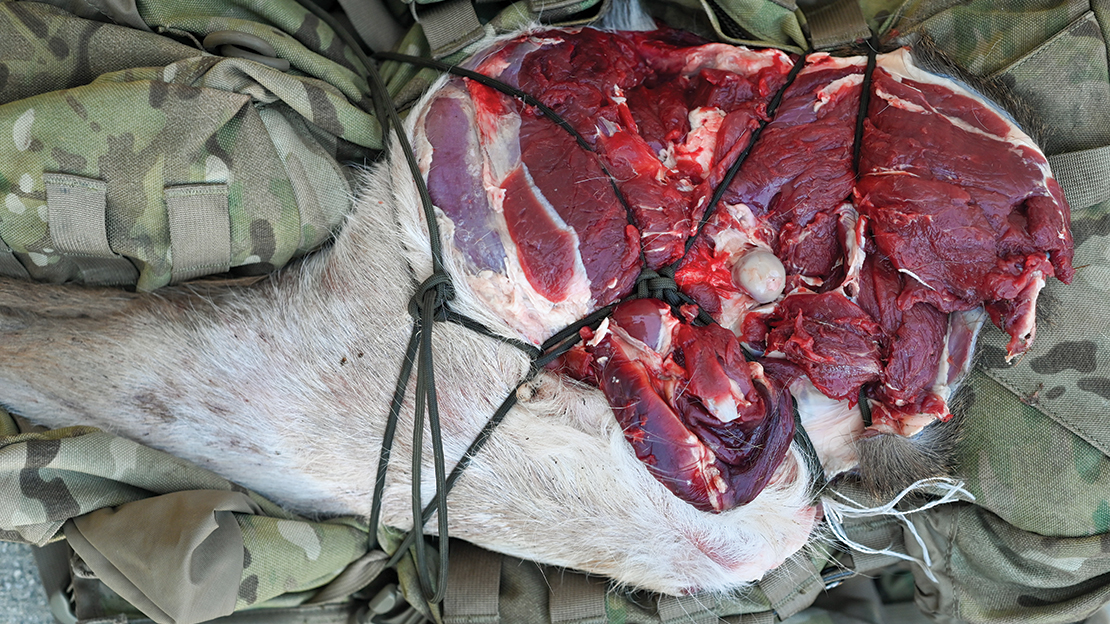
It’s smart to attach blaze orange or another bright indicator to visible skin or a head to ensure other hunters don’t mistake it for a live animal.
Whole Animal Backpack
Carrying out whole animals is beneficial because not only does it bring the most meat out but also, keeping the skin on and bones in protects the meat on the tote and during the aging process. Whether it’s used on a day hunt or to bring meat back to camp during a longer multi-day trip, this technique keeps meat clean, together and without waste or loss.
I normally employ this method on animals that are headshot or archery shot where little to no meat is lost to shot damage. Thankfully, this is normally female or younger animals that are light enough to carry. The weight of these lighter animals themselves might not make the pack out challenging, but the awkwardness of carrying the long and unbalanced load can render it very difficult. This backpack technique provides secure positioning and control of an otherwise unwieldy load.
To remove an animal’s head, bend the head forward against the animal’s neck. Cut down between the back of the animal’s ears with the tip of your knife until it goes into the joint, releasing joint fluid. Continue the cut to either side of the joint, severing connective tissue, and around the front of the neck. Once the connections on the side of the joint are freed, a twist will further open the joint and allow remaining holds inside the joint to be cut.
The backpack is quick to make; although not as comfy as an actual pack to carry, it allows for good weight distribution and, most importantly, gets the job done. Animals can be gutted or left whole. Gutting animals, unless carrying the guts out is required, allows the meat to begin cooling quicker. On top of that, it saves weight and admin later. For meat animals, the head can also be removed to reduce weight. If the head is desired, it can be left on or removed and carried in hand or in another load. Keep in mind, leaving the head attached allows for more play that could get you off balance in uneven terrain.
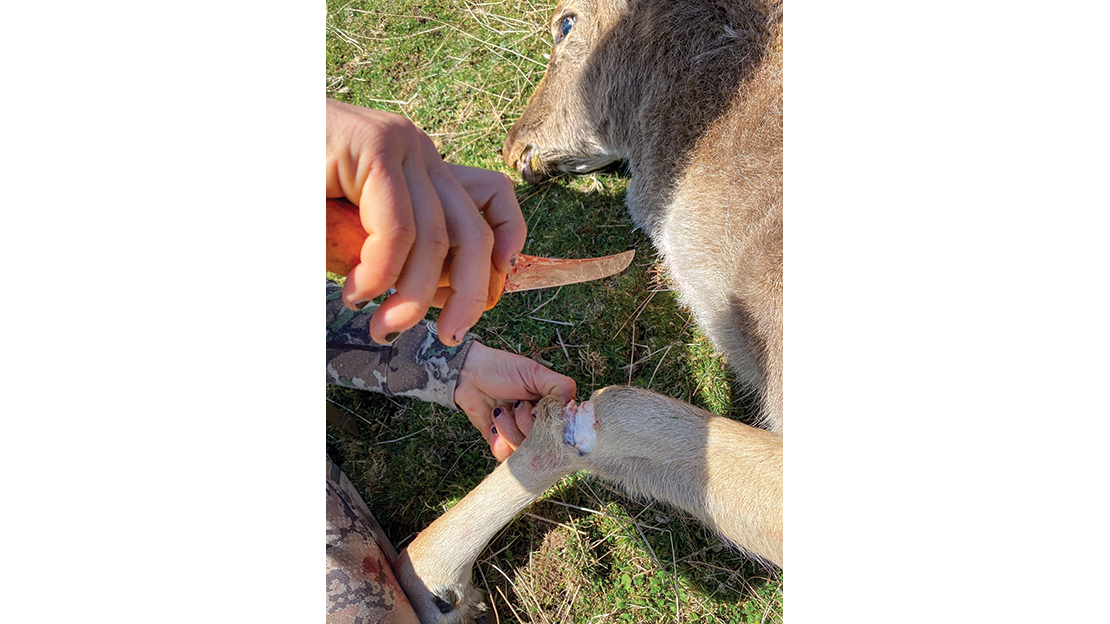
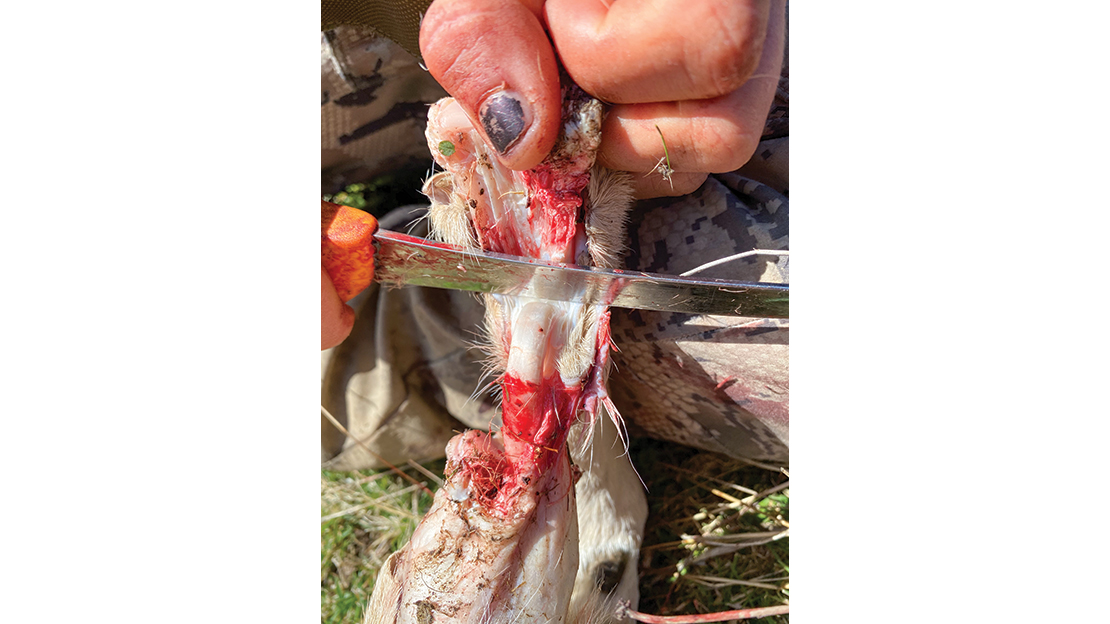
To make the pack, simply bend the front knee joint over itself and cut through the lower break of the joint and around the sides. The front knee joint is complex, and the task will be more straightforward if the bottom break is severed. However, if an upper joint is opened, it’s still achievable. A twist will complete the break without risk of severing the strong suspensory ligament at the back of the knee. Once the joint is open, run your knife down toward the hoof, parallel to the bone for three or so inches. The freed ligament and skin will hold the pack together.
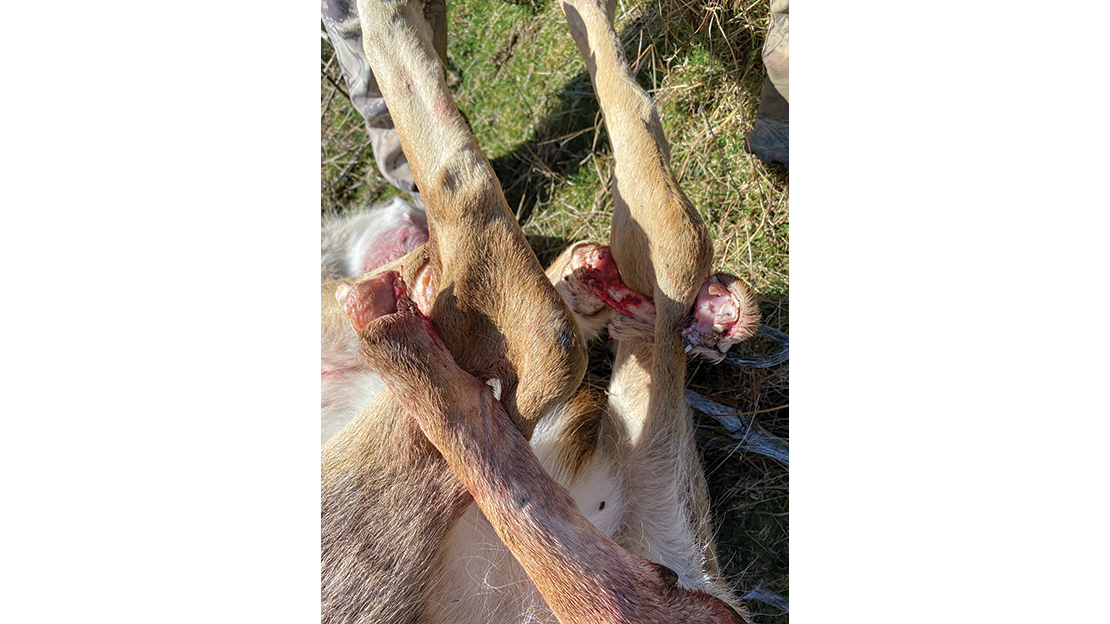
After this is completed on both front legs, cut slits through the skin large enough for the front hoof to pass through between the Achilles tendon and the rest of the hind leg just above the hock joint. Pass each front leg through its corresponding hind slit until the break. At the break, turn the lower portion of the leg to ‘T’ against the slit and your pack is complete! Although it adds weight, leaving the lower portion of the hind legs on acts as a lever to help stabilise the load. Because I have narrow shoulders, I find it easier to carry my load with the front legs pulled through from the inside out. See what works best for you and your load! Propping the deer up against something can make it easier to put on the pack.
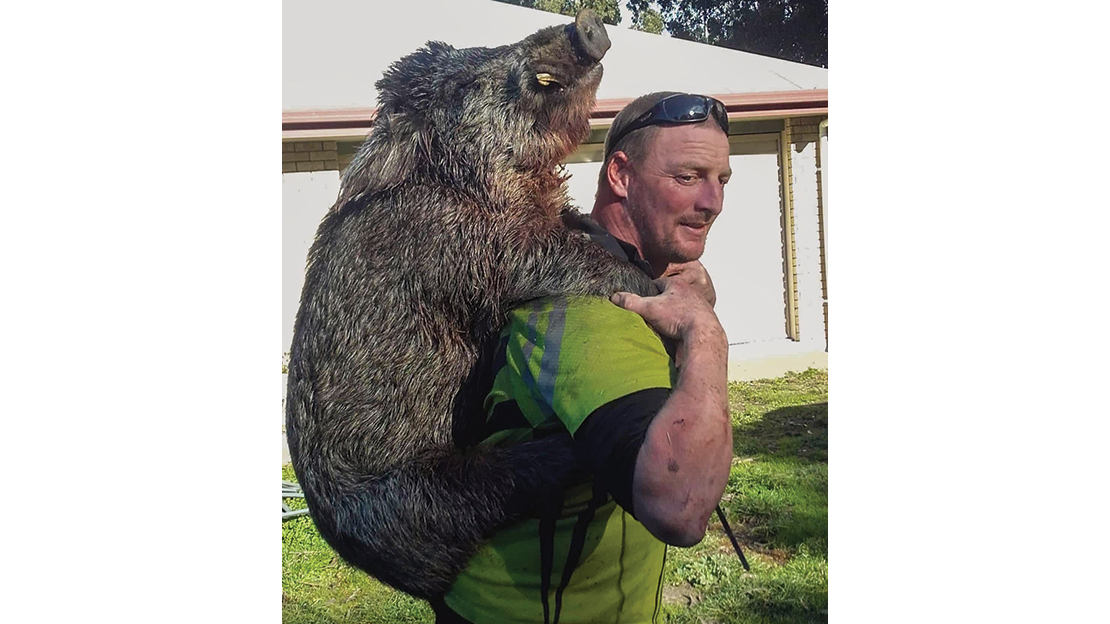
You’ll find pigs’ legs are too short for this technique to work. Most pig hunters use rope or dog collars to attach the front trotters to the rear trotters or hocks. Adjusting the length between the legs to the best fit for the person carrying saves pressure pinching under your arms, deadening your shoulders on a longer tote. Rope is also fastened around the lower jaw to manipulate the head both for balance and because the large head is what often gets snagged in the bush.
Whole Body as Is
For a quick, simple, shorter carry with smaller animals, simply throwing them over your shoulders works well! While this may seem straightforward, trial and error has taught me that how you distribute the weight affects the balance of the load tremendously. If this load is ‘off’, a lot of energy is utilised keeping it in place, whereas if it’s better balanced, energy is saved for the walk.
Again, gutting allows meat to cool and reduces weight. However, I generally employ this method with guts in, because normally I’m either carrying smaller game, like chamois, for a photo or to a more spacious area to cape and clean, or smaller goats or fallow on private land where it’s good etiquette to not leave a mess if you can. Where I hunt whitetail in the States, the animal is required to be brought back whole, with the guts in, to collect data biologists use to determine the health of the whitetail population for the area.
Position both hind legs over one shoulder and the brisket over the other. Splay the front legs to the front and back of your shoulder and allow the head to drape forward and down. Holding the hind legs and one front leg stabilises the load, with the majority of the balance managed by one front leg. Here, too, keep in mind that any dramatic change in the animal’s weight could easily knock you off balance in steep terrain.
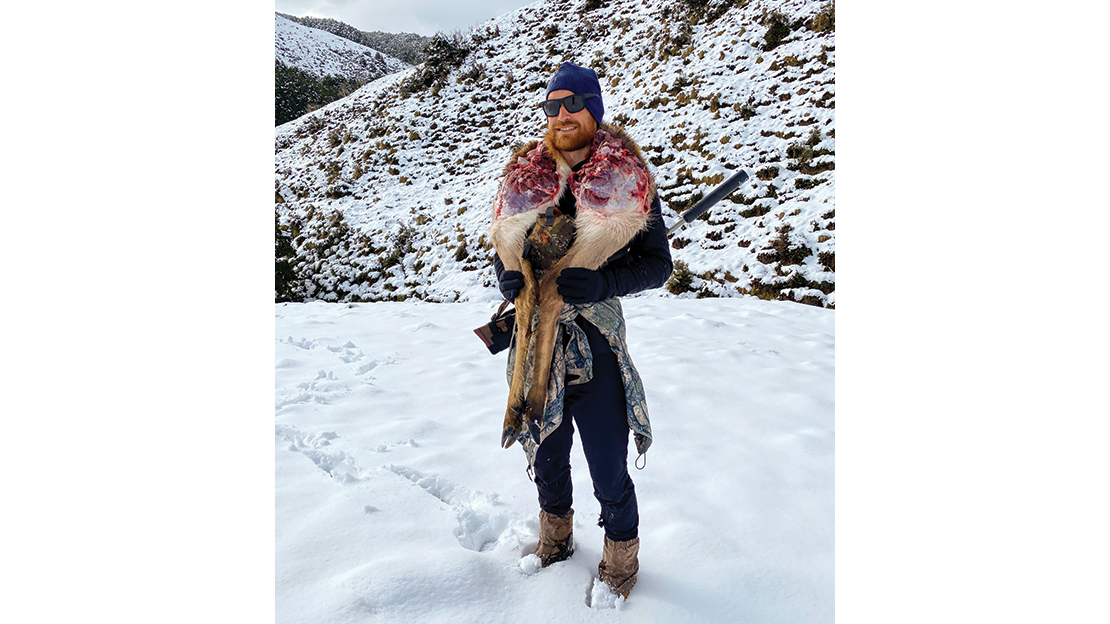
Back Legs or Shoulders Technique
Generally, when only portions of an animal are suitable for consumption, usable meat is broken down to fit in or on a pack. However, with full packs or without packs, it’s useful to know this simple trick for carrying quarters.
Quarter legs from the underside of the animal normally but leave the skin on and allow the skin to remain connected between the two opposite legs (both shoulders together and both hind legs together). Then a leg can be placed on either side of your neck over your shoulders with the hair side down. For smaller animals, the lower portion of the legs can provide a handle for balancing the weight when carrying. On larger stags, the excess weight of the lower legs can be removed, and slits cut in the skin above the hock (as instructed for the whole-body pack) will provide a handhold for stabilising the load. To a reasonable degree, the wider the portion of skin kept between the legs, the more uniform the distribution of weight across your neck and shoulders. When loaded, make sure the skin isn’t bunched to prevent focussing this pressure on a small area.
In NZRod&Rifle Vol 40, Issue 3, Dave Benfell describes making a pack out of the hindquarters leaving the pelvis attached. Although I’ve never tried this technique, it seems like it would be a much more comfortable option for longer distances with heavily weighted stag hindquarters, and I’m keen to give it a try. Keep in mind, though, it does require the additional time of gutting the animal and adds weight of more skin and bones. Check it out in the past issue or find the article online here.
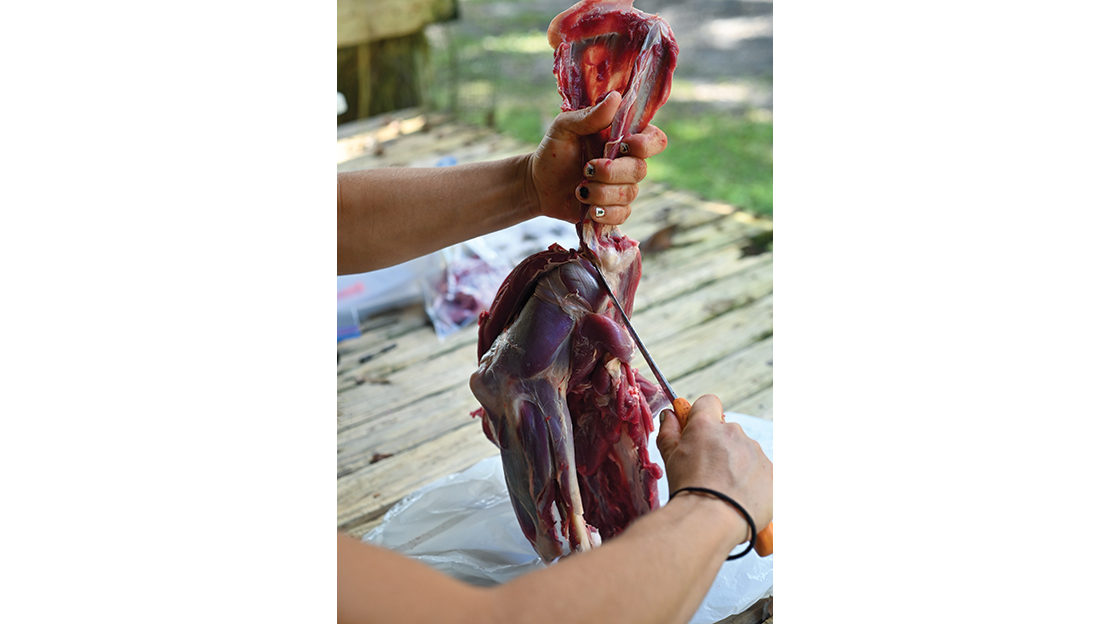
Deboning Meat – Carried in a Pack
The most comfortable way to carry out meat, hands down, is skinning and boning out quarters to load into a pack. The disadvantage of this technique is that the support the bones give the meat for hanging, as well as the protection the skin and bones provide whole quarters for transport and aging, is lost. However, reducing space and weight makes this method extremely valuable in backcountry situations.
A quick technique for keeping quarters connected while deboning without interfering with any of the prime muscle cuts begins after the quarters are removed from the carcass and hide. Work the quarters on the inside of the hide or on the carcass of the animal to keep the meat clean during the process.
For hindquarters, face the inside up and slide your knife along the seam of the small meat flap between the exposed bone of the ball joint and the stifle. Under this flap, angle downward between muscle groups until the bone is reached. Then, work the knife gently along the bone, freeing the meat without dulling the blade. Longer blades with somewhat flexible tips work best for this, but whatever knife is available in the field will accomplish the task. Once the centre of the femur is clean, free the meat and sinew attached to the top ball joint. From there, hold the ball joint upright and use gravity’s effect on the loose meat to help cut the meat from the stifle joint and continue down the shank.
Front shoulder blades require a bit more knife work but are still worthwhile. From the top side of the shoulder, cut posterior to the middle bone protrusion of the blade. Once bone is reached, slide the knife flat along the shoulder blade. Next, cut down the front side of the protrusion and along the blade. At the end of the blade, curve around to the underside and continue freeing meat along the backside of the blade. I free the back side of the shoulder blade from the top to prevent cutting connections to the remaining shoulder meat. Like with the hind leg, once this upper portion of meat is freed, hold the leg upright and allow gravity to help work the meat loose along the remaining bones below. Use caution at the joints to avoid severing connections holding the muscles of the leg together.
Fastening Quarters to a Pack or Packframe
Sometimes, camping gear and supplies leave little room in a pack for all the meat harvested. If a pack won’t hold all the deboned meat, whole cuts (quarters or ribs) can be tied to the pack. When fastening quarters to a pack, leave the bones in for structural support – trying to fasten meat without bones is like trying to tie jelly. Leaving the hair on also can help protect the meat.
The main two points to consider when tying a load are:
- Centre the load. Avoid making the pack too top heavy or excessively bottom heavy – this can create a situation where you’re slightly off balance.
- Secure the load tightly. Prevent play and movement that can alter weight distribution and unbalance the packer or cause the load to come loose.
Packframes with a game shelf make it easy. For these, you simply set the upper portion of the quarters on the shelf with the lower portion of the legs skywards and fasten the horizontal straps tight around the load. The pack portion can then be secured over the meat to the frame.
However, meat can also be secured to a regular pack. If carrying multiple cuts, assign flatter cuts to against the pack and meatier cuts to the outside. For example, ribs would wedge well between the pack and a hindquarter. If tying on two equally balanced quarters, tighten each on either side, slightly overlapping. Unbalanced quarters (e.g., a hind leg and a shoulder) can be stacked facing opposite directions. Keep in mind a strong frame helps to carry heavier loads. Ideally, only one quarter is strapped on, and other meat is deboned to carry in the pack. Fastening too much weight away from the support frame will make loads less balanced and more difficult to manage.
Most packs come with tie-down straps on the outside. These can be cinched across the load or crossed over in an X. Rope or paracord can help secure meat further – using it to bite and tighten between the horizontal cinches and around the bottom of the meat will strengthen the hold and provide a tie-down to loop the shanks to centre.
If securing a quarter to a pack without straps, use rope or paracord to secure. Fasten two horizontal latches using a loop in one end to cinch the quarter down. After these are tied off, cinch the two together with a few bites. Bites going all the way under and around the meat can help secure the bottom, if length of rope allows, and bites around the shank back to a horizontal cinch likewise reduce play that could loosen the load.
While meat should be secured onto the middle back of the pack, heads can be secured onto the top of the pack. Facing heads backwards and antlers down and back is the safest way to carry racks. Location and angle for tahr and chamois will depend on the rest of the load.
Conclusion
Hopefully these techniques will help you recover the maximum from animals harvested, no matter the situation. The best way to cement them in your mind is through employing them yourself, so get out there and get some animals down!
Tip: Avoid cutting rope by tying off with a quick release knot and secure with a couple of half hitches. This loop can then provide a good leverage bite to hold additional cinching in place.

SHARE YOUR BEST PICS #NZRODANDRIFLE