Hunters should always have an open mind to different ways of doing things no matter how experienced they are; everyone has their own approach, and if you observe, you can pick up some very effective alternatives to the standard methods taught – this is no different for techniques for recovering your venison. Deer come in all shapes and sizes and what works for a huge red stag in the rut may not work for that yearling sika you shot with your 300 WM, so it makes sense to have a few variations in the bag. This series will showcase a different method each issue and allow you to decide which techniques you want to try and what suits your type of hunting.
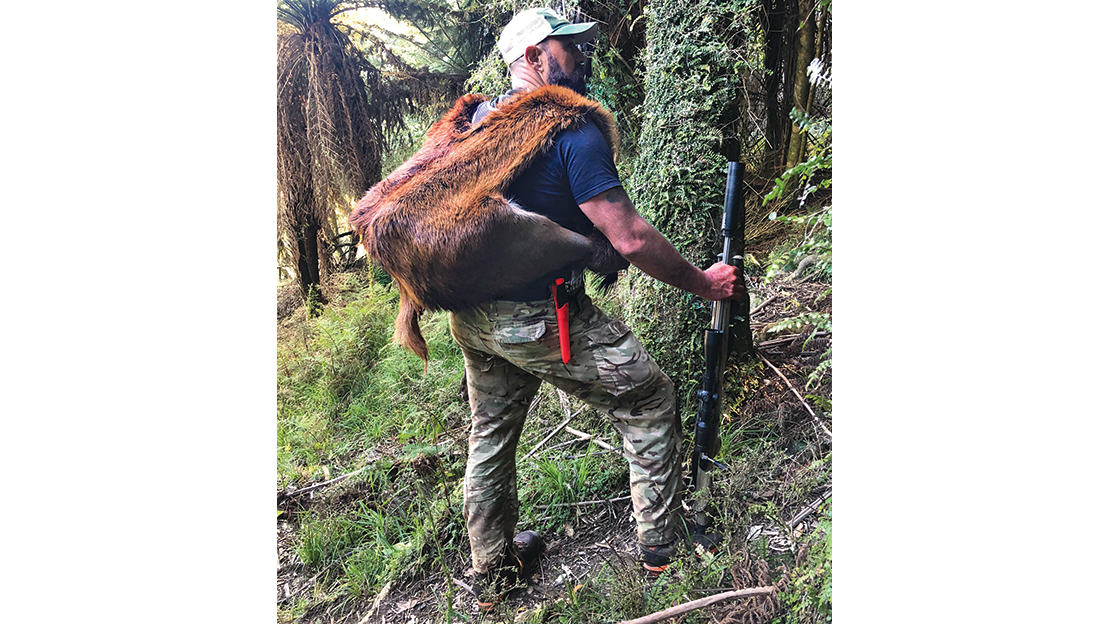
The Hindquarters Backpack
This method works great on all sizes of deer and is especially useful when there’s been a lot of wastage on the shoulder from bullet damage; it’s also the most comfortable way I’ve found to carry hindquarters. You do have to work out how to carry your daysack, but if you have a small pikau or are on a short day-hunt, this technique works very well.
STEP ONE
Start with gutting your deer in whatever way you prefer, and remove the head. I like to remove the anus along with the guts but that’s personal preference. Once you’ve finished gutting, place the animal lying flat on its stomach with the back straps uppermost and make an incision up on the neck. Try to get your blade cutting the least amount of hair as possible as this blunts your knife very quickly.
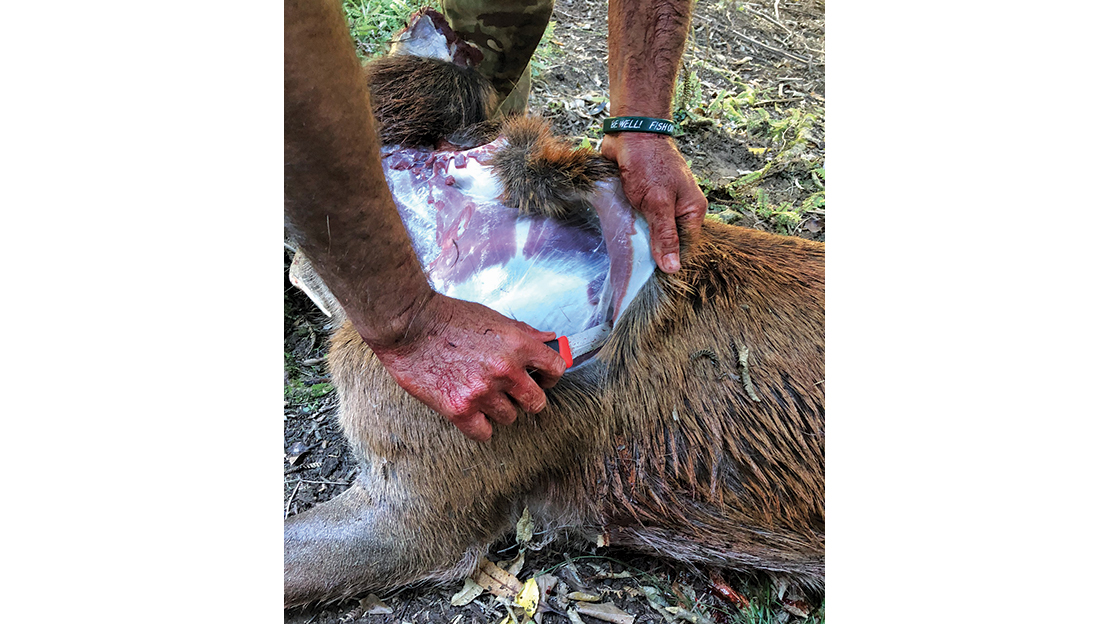
STEP TWO
From the neck incision, skin all the way back to the hip joints. The hip joints are also a good indicator for where your back straps finish. Make the flap as wide and long as possible as this’ll make the finished product a lot more adjustable and comfortable
STEP THREE
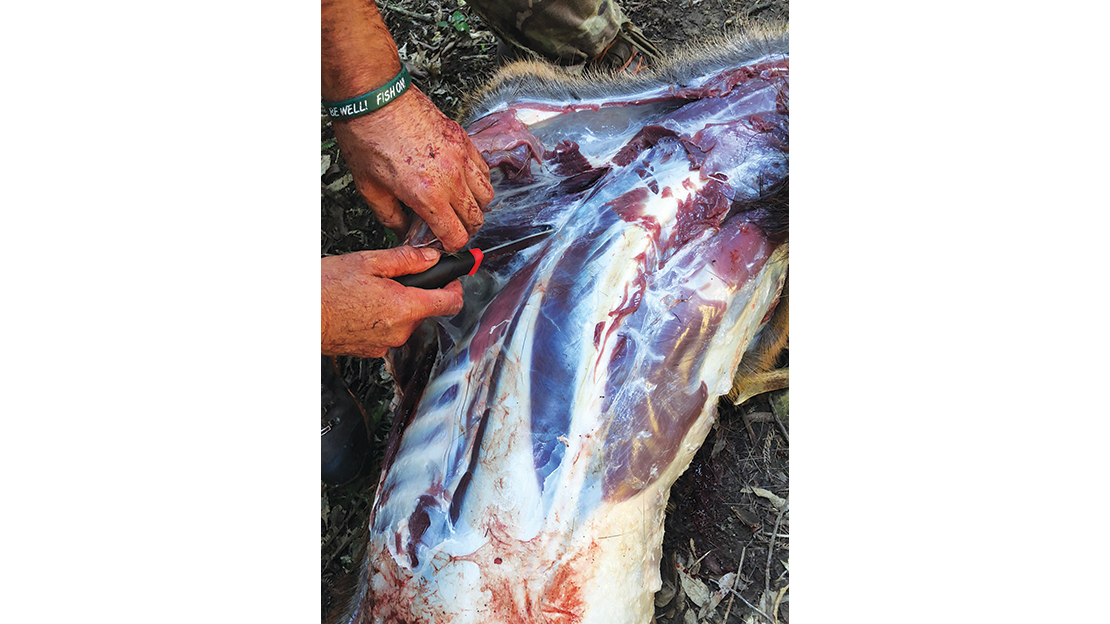
Remove the shoulders. From this position, I like to come in from the top as it means less movement, but I know a lot of you prefer to start from the brisket and that’s fine too. The technique is to slide your blade in behind the shoulder blade and work your way between the shoulder and the ribcage until the whole shoulder comes free in one piece. Recover any meat you want off the shoulders or leave them whole to carry.
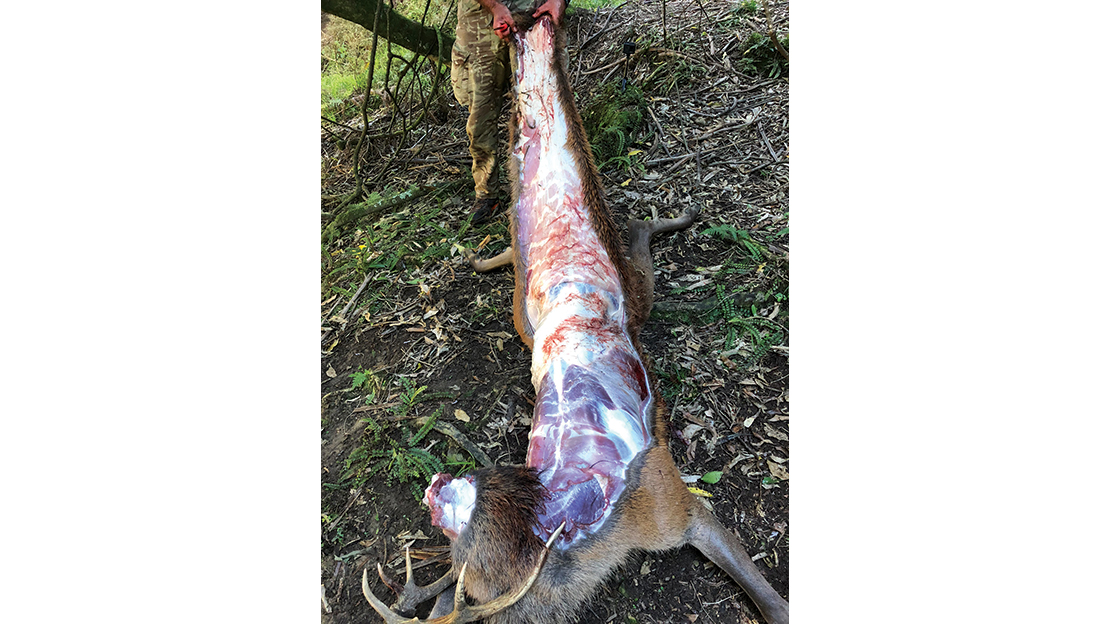
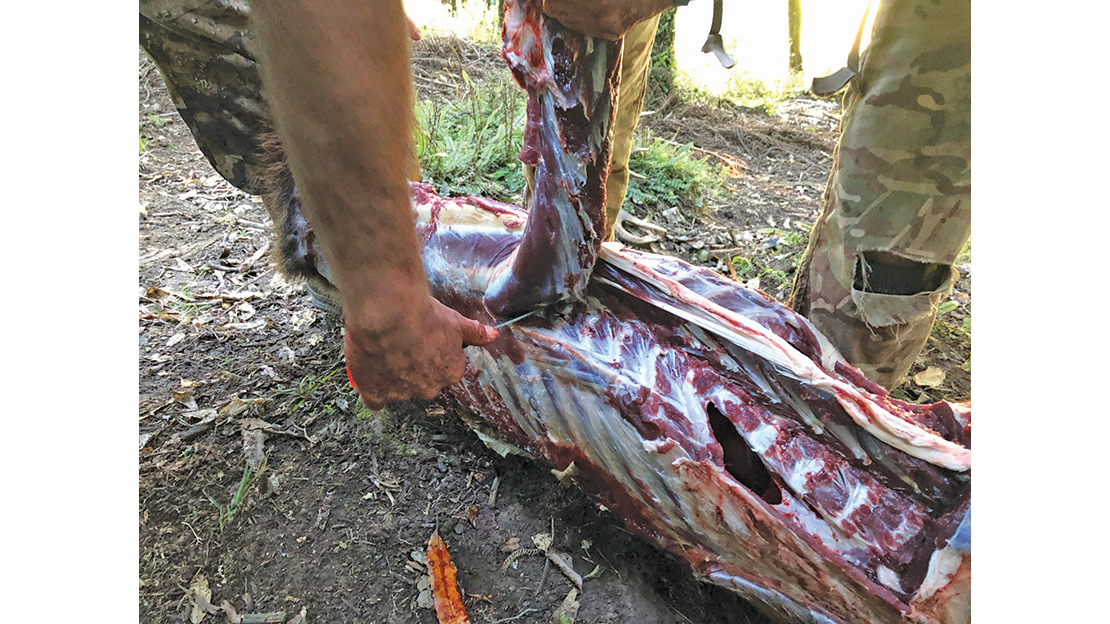
STEP FOUR
Remove the backstraps by your preferred method, then remove the inside fillets. Once any extra meat is removed from the front ¾, you can cut this away by severing the spine. Extra meat can be found on the neck, in between the ribs and on the brisket. The best place I’ve discovered to separate the animal’s spine is found by running your finger along the inside of the vertebrae and identifying a small flat area; the middle of that flat area is where your knife will slip in between the vertebrae and you’ll be able to separate the spinal column easily. (See photo over page)
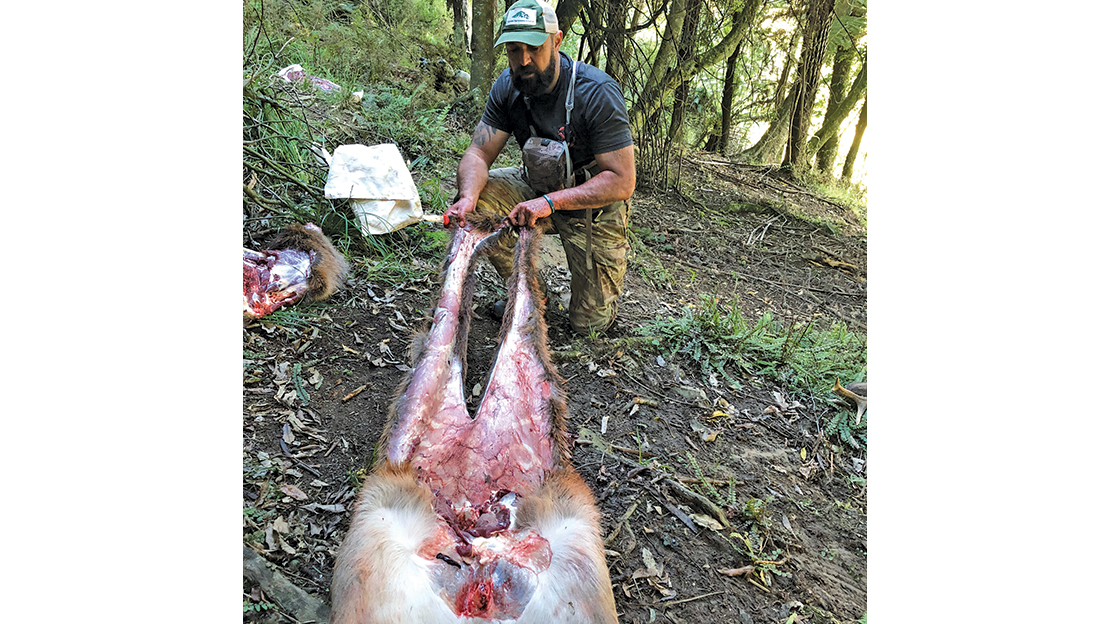
STEP FIVE
Once the front ¾ of the animal is separated, cut a slit down the centre of your skin flap. Then cut an extra slit near the end of each newly made ‘strap’.
The positioning of these end slits has a big impact on the length of your shoulder straps. Rule of thumb is … you can make it longer, but it’s difficult to make it shorter – so best to start short and adjust if necessary. Also, for comfort, you want each strap to be as wide as possible.
At this stage, you can remove the rear hocks and make a slit in between the ligament and the shank (where you’d place a hook for hanging the carcass).
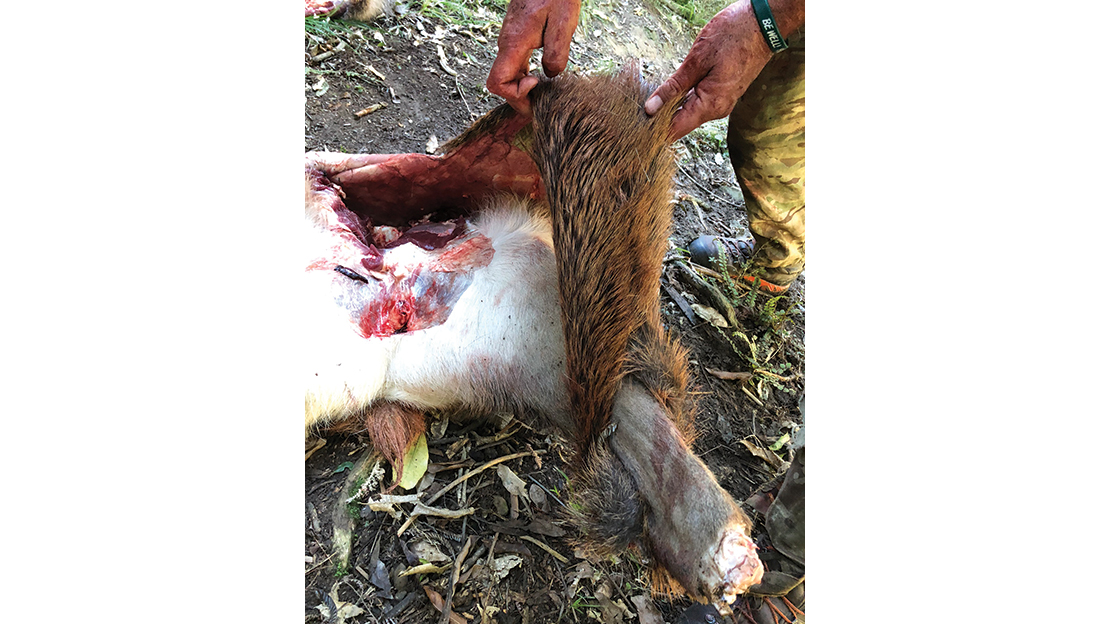
STEP SIX
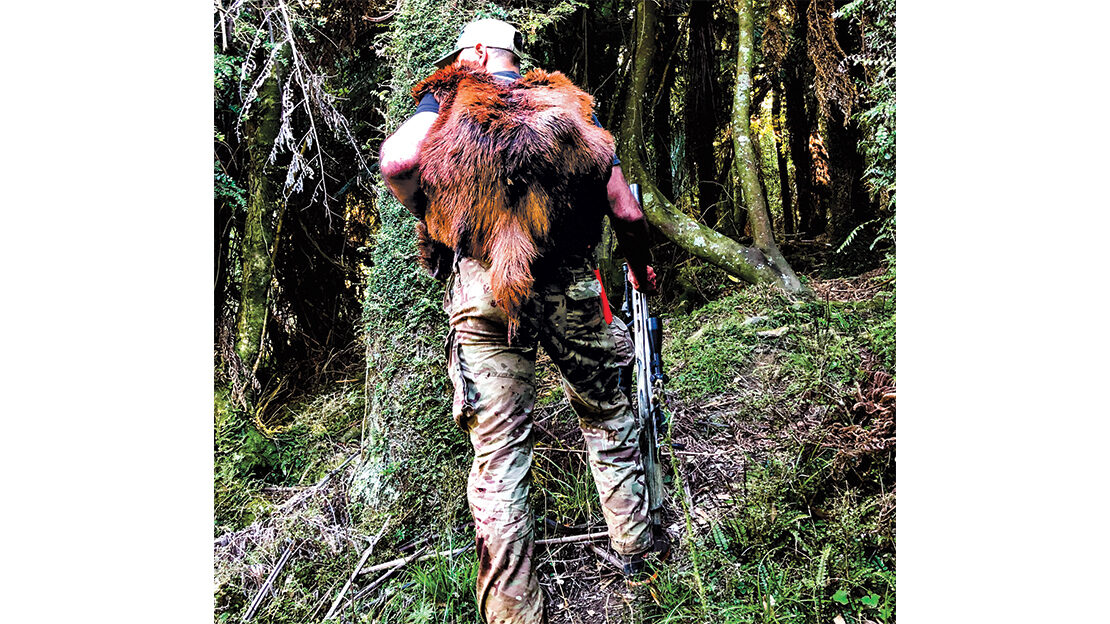
Take each flap of skin and thread it through the cut in the shank and loop the slit over the end of the shank. Repeat on the opposite side. These flaps of skin, once attached to the shanks, become your shoulder straps – your backpack is now complete. You can adjust the shoulder straps for comfort by enlarging the cuts.
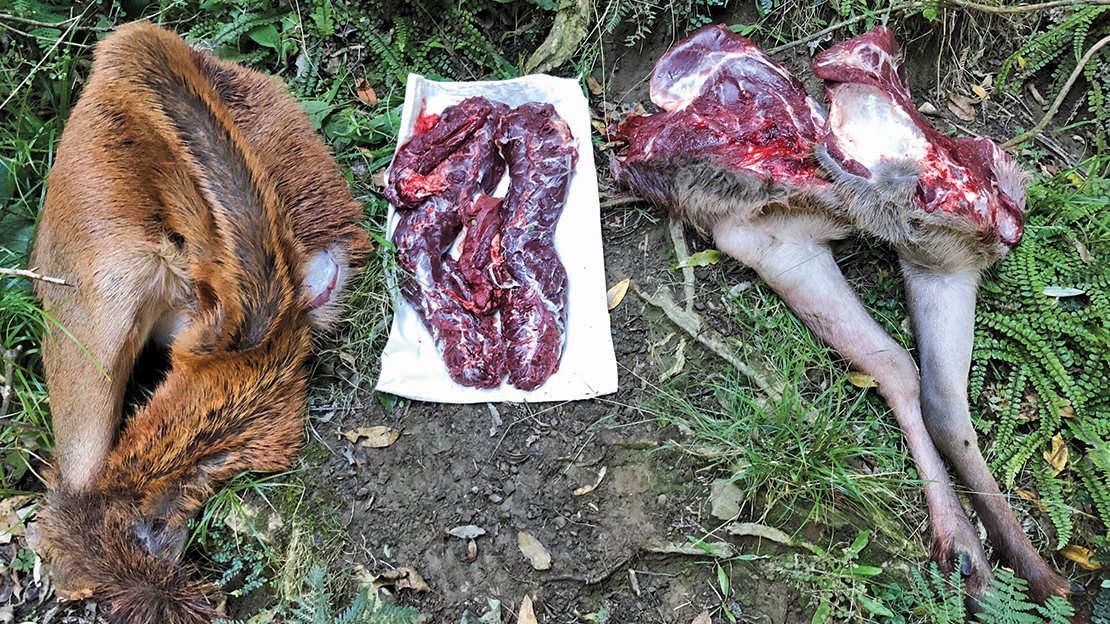
The finished product.
If the shoulders are in a good state, they can be carried out whole or broken down and packed away. There’s a variation where the back straps stay attached to the hindquarters and are tucked underneath the shoulder straps/skin flaps.
SUMMARY
This type of backpack is incredibly comfortable, and once you’ve worked out a system to carry your pikau as well, it’s a fantastic way to recover your venison. Carrying out hindquarters and prime cuts after recovering whatever’s usable on the main carcass is nothing new; but hopefully, this technique gives you a starting point to working out what methods suit you best.
TOP TIPS FOR CARRYING OUT YOUR VENISION
1. Learning several different options to pack out your venison gives you the ability to cater your method to the occasion. The size of the animal, bullet damage, distance of your walk out and the weather conditions can all play a role in your decision-making.
2. Be wary of recovering too much damaged meat. There are a couple of reasons for this; firstly, a solid shoulder shot with a calibre or projectile that causes a lot of damage, particularly on a small animal, leaves a lot of unusable meat. Secondly, if the projectile contained lead, then there’s probably a lot more contamination than what’s obvious along the bullet path. Studies in the USA have shown some hunters with dangerously high levels of lead in their bodies – projectile contamination was a likely source.
3. When cutting through hair and skin, try to never saw across the hair; this blunts your knife very quickly. Make sure your knife is contacting skin whenever possible.
4. Be wary of carrying too much at night-time, especially if your route back to camp has some treacherous footing. Remember, it’s always an option to hang and cover your venison and come back in the morning. If you’re leaving a whole carcass overnight, I always advise gutting the animal and hanging/cooling it, as any piercing of the digestive system can lead to contamination if it’s left inside the animal.
5. I avoid carrying venison in plastic and instead use pillowslips; this works well for the inside fillets and the backstraps. The reason cloth is much better is because your meat needs to cool as soon as possible so needs air flowing over it; hence why plastic is not ideal.
SHARE YOUR BEST PICS #NZRODANDRIFLE