The tall target test is one of the easier and most useful processes you can do to set yourself up for long-range success. Big statement, right? Well, the first part is certainly true – the process itself is reasonably straightforward, and the second part is important if you have any doubts about the accuracy of the elevation dial on your scope. The goal is to get a number that we can then input into a ballistic solver so we’ll know when we dial the actual elevation, changes will be what the solver predicted.
Why Test?
We take for granted that manufacturers make scopes to the highest standards, and to be fair, that’s mostly true; even less expensive scopes are surprisingly well made these days, and the science behind making adjustment systems is well understood. So why do the tall target test? Firstly, so you know what the accuracy of the adjustments are, and secondly, so you can generate a number to put into your ballistic solver if you find out your adjustments aren’t perfect.
The basis of the test is to establish the accuracy of the adjustments; are they true 1/4 MOA or .1 MRAD? The test is the same for MOA vs Mils with the constant figure the only change. The second reason for the test is to check if your scope is perfectly aligned to your rifle; by this, I mean whether your scope reticle is straight up and down above the centreline of your rifle. Many scopes are not; I see it all the time in the shop, and many customers don’t even notice it. If it’s out, what you’ll see is vertical tracking that’s left or right of the line, and this error will become more pronounced as you dial up more elevation.
How to Test
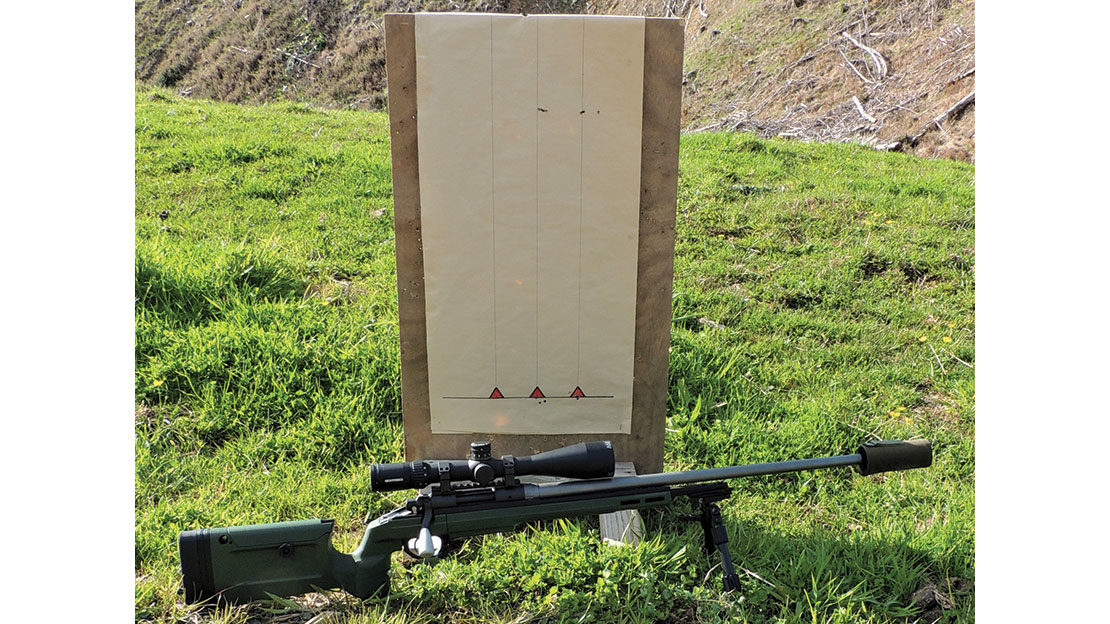
To start, you’ll need a target that’ll allow you to fix a metre high (or close to it) piece of paper. I choose this size as I prefer to wind on at least 20 MOA or 6 Mils of elevation. The reason for this number is that in a hunting context using a long-range cartridge like a 7mm Rem Mag, 20 MOA/6 Mils is 900yd/822m, and this is a long shot for most hunters. For those who shoot at extended ranges, you may wish to go to 30 MOA/9 Mils. If a scope is out by a few percentage points but is consistent in its error, the test will allow you to use it accurately by applying the correction figure to your ballistic app, and you’ll then get reliable solutions.
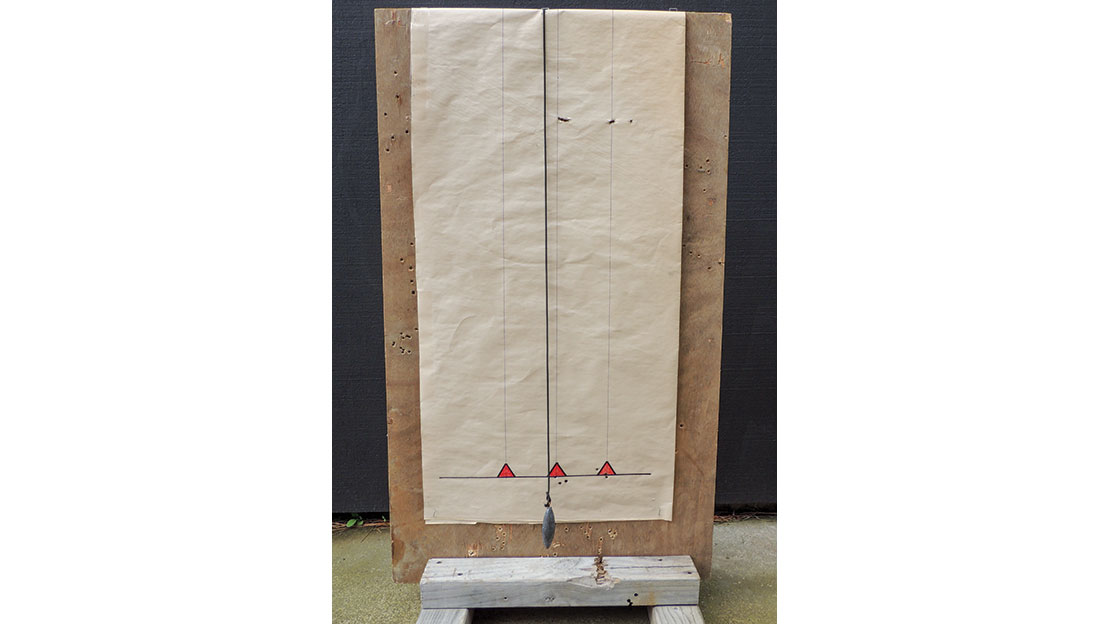
Setting up the target is crucial; it must be truly vertical and the exact distance to the target must be known. To get the vertical aligned, set up your target board, place your target on the face, and use either a builder’s level or plumb bob to get the lines on the target aligned to true vertical. If this bit is out, the test is compromised, especially as it relates to testing your scope’s true alignment to the rifle.
Once we have the vertical sorted, we need to know the true distance between the scope and the target. You can do this two ways: by using either a laser rangefinder or a long measuring tape. When I first got my old Bushnell Fusion binoculars, I tested them at 100m with a long tape measure; the distance on the binos was 100m, but you could move around ½ metre of that and it would still read 100m. Therefore, I call them 99.5% accurate.
For this test, I moved between 99 and 101 yards and went right in between the point of change between 99 and 100, and 101 and 100 to get the truest distance. I chose yards over metres as I have MOA scopes and MOA to yards is how I work. If you run Mils and metres, the process is the same but the constant changes.
Results
It’s now time to shoot the groups – three-shot groups are fine, and the more accurate the rifle, the better. I shot three shots on my zero mark, wound on 20 MOA and shot another group. So, let’s do some maths.
The MOA formula: Distance x MOA x .01047 (yards) or .01145 (metres)
The Mils formula: Distance x Mils x .03936 (Mils) or .03599 (yards)
The .01047 is the constant that’s applied when working in yards and MOA; the other constants apply based on your distance and your elevation MOA vs Mils.
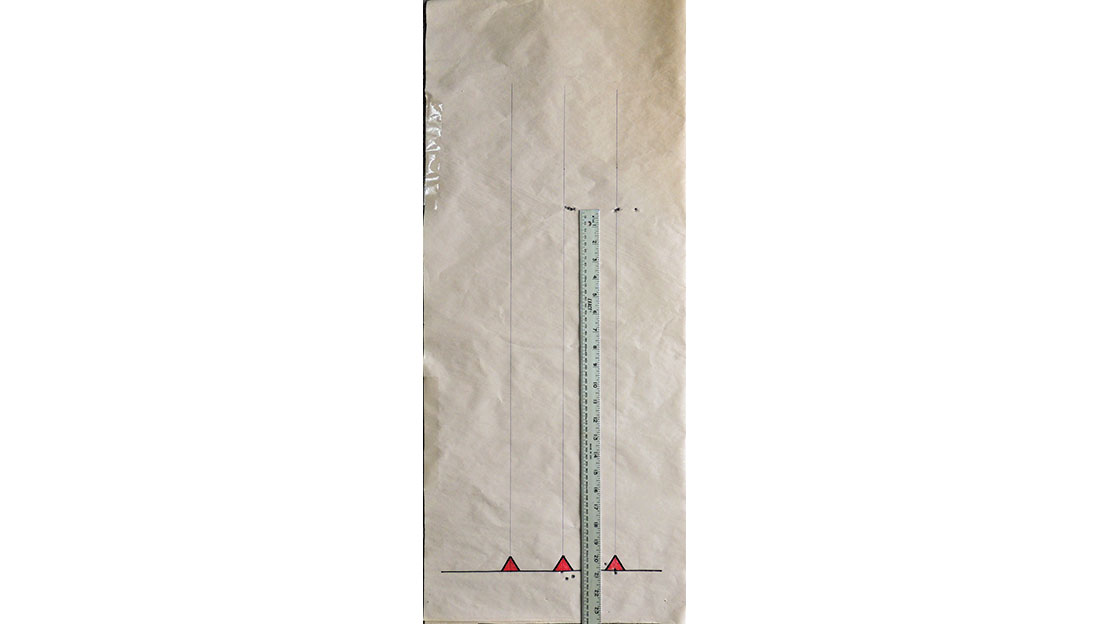
For testing, I used my Remington 700 in 6mm Creedmoor. It has a Criterion pre-fit barrel, KRG Bravo stock, Ase Utra SL5i suppressor and the scope is a Nightforce 4-14 SHV first focal with an MOAR reticle. The ammo was Hornady Match with the 108 ELD-M bullet. When I measured my distances, I was 534mm between group centres. Using the calculation, I got 100 (yards) x 20 (MOA) x .01047 (constant) equalling 20.94 inches or 532mm. To see this as a percentage, I divided my expected impact shift, 532mm, by the actual shift, 534, to get a correction factor of .996. I then repeated the test, as I had 6 rounds left, and the measurement this time was 530mm. So, doing the math again, I got 532 divided by 530 for a correction factor of 1.003.
Conclusion
What can I take from this? Well, I was under by .4 percent and over by .3 percent; averaged, they come to near on 99.9 or .1 percent off. To me, that’s near perfect, and to be fair, I wouldn’t even bother putting .1 percent into my ballistic calculator; but if I’d been a whole 1% or more out, then I’d definitely have put that into my ballistic app.
The next thing I can take out of this is that the shots from my first group travelled vertically without any left or right deviation compared to the bottom group. The second group had a left and right shot bottom to top but with two shots in each group touching and in perfect vertical alignment. I’ll put that down to shooter error; it was a big day of shooting, and I was battling a heavy trigger.
So there you have it – a simple test to determine whether your scope adjusts accurately and is mounted correctly. I think it’s a worthwhile process in that it helps eliminate a variable, and in the end, that’s what success at long range is all about … getting a lot of little things right for a perfect result.
Points to Remember
• Measure from the centre of the scope to the target.
• Using a bubble level is very worthwhile; just get your scope on square to the rifle first.
• Make sure the target is vertical; don’t rely on your target board being straight up and down – use a plumb bob or builder’s level.
• It doesn’t matter what rifle you use – it’s a scope test, not a rifle test. It may be easier to use a .223 or other smaller accurate calibre, as small groups help make the measurements easier.
• The maths is easy – just choose the correct constant.
RANgeunits | Adjustmentunits | constant |
| Yards | MOA | 0.01047 |
| Yards | Mils | 0.03599 |
| Metres | MOA | 0.01145 |
| Metres | Mils | 0.03936 |

SHARE YOUR BEST PICS #NZRODANDRIFLE